Book recommendations for you
faux leather finish with brown bags
Last month, I introduced you to a very talented local artisan and fellow mom of three.
Didn't you just love her French-inspired dresser she made using an overhead projector?!
In case you missed it, you can see it here.
And don't forget to pin it so you can inspire others too!
This month Laddie is back to share another genius technique with my readers.
Since Laddie doesn't have her own blog {yet} please make sure you leave lots of nice comments for her and go and visit her Facebook page to show her how much you appreciate her.
Hello again! This is Laddie from Re-New Furniture Finds & Re-Finishing.
A BIG THANK YOU
to Rachel for inviting me back for another guest post!
Today I'd like to share with you a faux finish that is in-expensive, easy peasy to do and the end result
is really super cool!
The first time I tried this technique was on the top surface of an end table.
It was a cool effect that resulted in a marbled faux leather look.
Then I had a client with a large plain 6 drawer pine Ikea dresser that needed
some spicing up for her teenage sons room. This finish was masculine and
perfect for this piece! She loved the idea of doing it on the drawer fronts
and her son loved the finished dresser.
So, recently she brought me a nightstand to do in the same finish
to go in his room and I thought I'd take you through the process with me.
The materials you will need are:
- Brown masking paper or any light weight paper bag
- Mod Podge
- Foam brush
- Glaze (I used Martha Stewart Black Coffee)
- Scissors
- Rag
- Polyurethane (optional)
The first step is to paint your furniture piece your desired color. In this case I used
a dark brown semi-gloss.
Then after it has had plenty of time to dry, rip off strips of the brown paper masking
and start crumpling it up
and crumpling it up.
Open it up and crumple some more
and a little more
until it is nice and soft.
Start in the corners and work your way towards the middle.
To get nice edges I cut the sides of the crumpled paper to fit.
Put a good coat of Mod Podge on the back of the paper
with your foam brush and then place it in its corner.
Leave it a little crumpled and layered with some creases.
DO NOT SMOOTH IT OUT
otherwise you loose your texture.
Continue this process in the corners and then overlap a little and layer
your way from the edges in to the center until the surface is completely covered.
Now take your foam brush and coat the entire top surface with
a layer of Mod Podge.
Give this time to dry completely and then we GLAZE!
The trick with glaze is to go light and use a little at a time. If it isn't enough
impact you can add another layer. If you start off too heavy
and dark it is much harder to reverse this process and go lighter.
So with your rag dip it in the glaze and get just a little and start
in the corner rubbing gently in a circular motion to get the glaze in to
all of the creases and layered edges.
You'll see that a little glaze can spread a long way!
Keep going until all the paper is coated to your liking.
Having some uneveness to your color
and shading will help with the look so don't worry about being perfect!!
By now you should have a really cool look going on!
I use a light spray polyurethane just to protect it but the layer of Mod Podge
has really already done that for you. If you are doing this
technique on a table surface the extra protection is a good idea.
Hope you give this a try on your next project! This
is especially handy on pieces that have rough tops or drawer fronts
that are beyond sanding! You can just HIDE the flaws!
Try using newspaper or sheet music as an alternative with
the same steps as above!
Happy Re-Newing!
Until next time, Laddie
Isn't that a great technique?! As Laddie said, it's a great technique to use if your furniture piece is just too far gone to save. So simple, but so awesome. Thanks Laddie!
Don't foget to "like" Laddie on facebook and see what else she's been up to.
And remember, show her some love today. I kind of want to keep her around and see what's she's going to show us next!
Living well on less-saving money on your cell phone-why a pre-paid plan works for us
Fall decor cheaply done, but not looking cheap!
I'm a little slow at sharing some of the Halloween and fall decorations around my house.
Forgive me. Fall has been a busy time around our house this year.
I don't like to spend a lot of money decorating for the holidays, and most years, the decorations I use are the same as the ones I had for the previous year, or ones that I pick up 90% off after the holidays.
Those are the best ones because most of the time I forget that I have them and then it's a surprise when I unpack them for the holidays! It's the little things people!
I've found that you don't need to buy a lot of new decorations every year, just changing up where you have the items year after year sometimes helps. I use a lot of my existing decor like this wire egg basket and this cloche and make them more festive by adding Halloween or fall items to them.
My husband likes to joke that I can't leave any flat surface undecorated for too long.
I *might* have a slight obsession with wreaths.
I added this little "spooky" banner to my book page wreath that is in my entry and the leaf wreath on the right was a garage sale buy that I got years ago for $5.
Remember my restoration hardware knock off subway sign I made?
I decorated around it with some small lanterns and bronze jack o lanterns and dollar store spiders.
Several years ago I shared with you my Beware sign that I made from scrapbook paper and an unfinished wood sign. I still love it.
This large woven bowl sits as the centerpiece on our dining room table.
I filled it with some of my moss boxes and acorns that I got at a garage sale last summer.
I have a small alcove on my front porch that houses some of my favorite vintage finds.
I added this autumn pumpkin that I got this summer for $1 at a garage sale.
My youngest son was asking if I would be adding the bird to Rocky's head this year.
Don't know who Rocky is?
It's our bear head. You can read about him here.
Of course we are going to add a bird to his head!
Love those dollar store crows!
Here's a close up of the decor on the mantle.
I found the berry jar filler on super sale at Pottery Barn {and by super sale, I mean three boxes were less than $1 total} a few years ago.
The {for real} vintage pharmacy bottles were bought at a garage sale a few years ago.
Wish I had bought more because I think they are my favorite things!
Of course, I can't neglect decorating my very large kitchen island.
I added a few candles and took a paper mache pumpkin and mod podged book pages to that too.
No book is safe in my house!
If you want to see my fall decor from last year, you can visit it here and see how many of the same items are being used in different places throughout the house.
My family's secret recipe for crock pot pot roast
I love using my crock pot.
I usually cook in it at least once a week.
I love that I can make dinner in the morning, and then forget about it all day.
I've shared with you my recipe for taco tuesday and how I make my own soup stock.
This is my mother's recipe that I still make today.
What you will need:
Crock pot
onion soup mix
onion
potatoes
celery
carrots
pot roast
I cut all of my vegetables up, (but not too small), and layer them with the potatoes on bottom, the onions next, celery and carrots thrown in on top.
Sometimes I add mushrooms too.
Then I take the onion soup mix and sprinkle just a little (about a quarter of the bag) of the seasoning on top of the vegetables.
Next I layer the meat on top and sprinkle the rest of the seasoning on top of the meat.
Finally, I add about 1/4 cup of water. No need for more water than that-the water in the veggies will keep the meat moist too.
Put a lid on it, and forget about it for at least 8 hours.
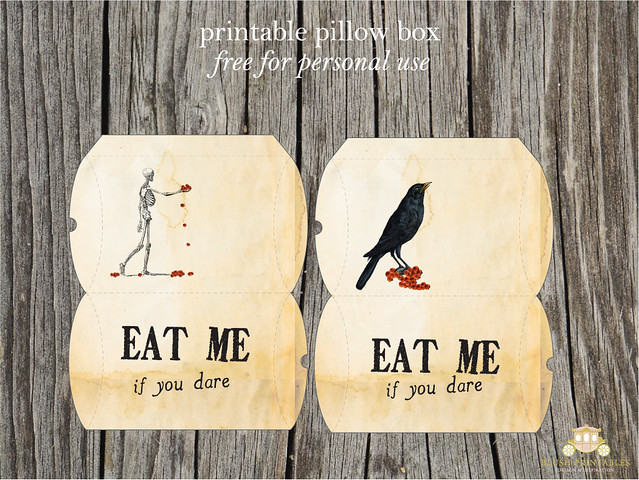
Free Halloween Printables you probably haven't seen before
Filed under:
free,
free printable,
Halloween,
holiday projects,
prinatbles,
real projects,
thrifty decor
Sweaty bands knock off Olympics style!
Because I have been working out with my own version of the sweaty bands, that I like to call hot mess headbands for the past two years.
I loved the idea of a non slip headband, and while at a running expo before my first half marathon, I picked one of the original sweaty bands up. I was running and doing group fitness classes and would have to be bothered during my workout to either retrieve the {so called} non-slip headband off of the pavement behind me, or readjust the headband I was wearing while still trying to maintain my workout.
However, my jaw dropped at the price tag...$16!
Holy cow!
"I can make that!"
And now my friends, you can too!
While this tutorial isn't new on my blog {holy craft}, I am updating it for Abby's readers to replicate the headband that we saw at the Olympics on Jennifer Suhr.
You will need:
14 1/2" of velvet ribbon-5/8 inch thick {velvet is the secret to no slip headbands!}
15" of grosgrain or sparkle ribbon {7/8 inch thick}
6.5" of 3/8" wide elastic {I used black}
Step 1: light a candle and singe the ends of the ribbons (no need to do this to the elastic). Be careful! Some ribbon does catch on fire. However, most ribbon will just harden on the ends. That is what you want.
Step 2: place your sparkle ribbon flat with sparkle side down, lay your velvet ribbon on top with the velvet side up (wrong sides of your ribbons together) and gently wedge the elastic ribbon between the two ribbons ON ONE SIDE only!
Step 3: Begin by sewing the elastic into place. I use my back stitch several times to make sure the elastic doesn't pull out of the ribbon when you are using it.
Step 4: Sew all the way down the length of the ribbon. Stop at the end before turning to the final short end.
Step 5: Carefully take the open end of your elastic making sure it doesn't get twisted, and squeeze the elastic between your ribbon and velvet, carefully sewing that end down, back stitching again to keep the elastic in place.
Once you have your elastic in place, sew up the length of the other side and then clip your loose ends.
That's it!
It literally takes about five minutes to sew these headbands.
This is my collection of hot mess headbands that I wear personally.
I have long layered hair and the non slip headbands keep my fly aways in check, but the best part is, my headband doesn't move once during my workout, no matter how hard I'm working!
Pretty sure I'm ready to go tackle the world
{or maybe just the stair climber at the gym}
with my new, special Olympian approved sparkle non slip headbands!
Subscribe to:
Posts (Atom)
Powered by Blogger.